Adding the existing feature to support Visitor Management System of setting date/time limit of user and create QR Code graphic for user, auto send QR Code graphic to visitor’s email, and finally 701ClientSQL added the feature of Print QR Code feature
Software version requirement:
701ClientSetup10v2 211105.exe and after
Printer Setup:
Step 1. Set printer for printing QR Code graphic as default printer
- First, you need to obtain the driver of your printer from manufacturer and install the driver in your PC.
- Go to Control Panel > Hardware and Sound > Devices and Printers The printer will be shown in the ‘Printers’ section.
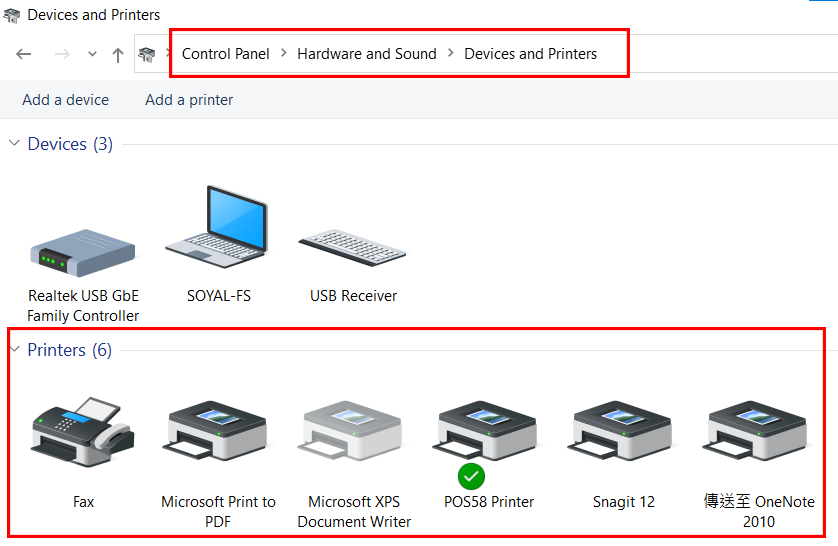
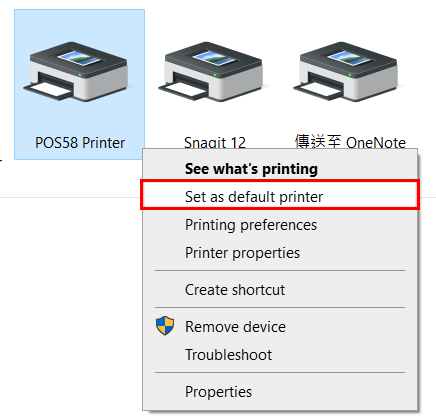
- Set the printer as default by clicking the selected printer > right click > select ‘Set as default printer‘
Step 2. Setting the printer cutter
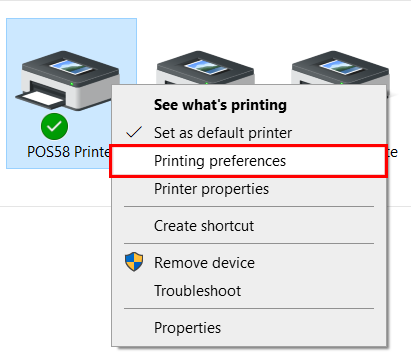
- Click the selected printer > right click > select ‘Printing preferences’
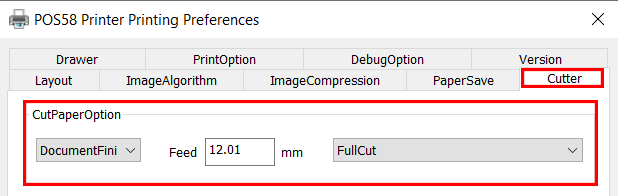
- Select ‘Cutter’ > CutPaperOption set as DocumentFinish > select FullCut.For Feed setting 12.01mm
Note:
(1)If does not required thermal printer to print the QR Code, please skip this step. Printing using thermal printer the QR Code size will be half of width of the size coming from standard printer
(2)Printing Preferences is different for every manufacturer, this example to show how to edit the printing setting in order for the QR Code ticket to auto print it from the printer.
- Then click ‘OK’
Step 3. User Card Edit
- Log in into 701ClientSQL
- Go to 8. User Card Edit > edit the user data such as user address, card ID, access mode, name and date limit if necessary
- Select Save (only when you click save the QR Code will saved change and new data is updated).
- Select Download to controller

Step 4. Printing QR Code
- Continuing Step 3, double click the QR Code icon

- The printer will automatically print the QR Code graphic including the visitor’s Name