Software version 10.3 and after SOYAL software implement multi-Area mode to support over 4000 doors in one system. Thus, there are three steps required for updating to Software version 10.3 and after.
After upgrading to software version 10.3, all of Controller will be automatically grouped as Area00 by default.
STEP 1. Enable Multi Area Mode (Area.Door)
Software 10.3 and after 701Server and 701Client access point composed of Area > Node ID > Subnode ID (if there is control panel and access controller wired to it) > door number. In previous software version, Door Number setting is composed of Node ID and Door Number, but in software version 10.3 Door Number setting is changed into Area and Door Number. It is required to set Door Number for every access controller to distinguish between one another and there should not be the same Door Number within the same Area.
Difference between Software Ver. 10.3 before and after can be seen when editing door number in 701Client Setting:

Software ver. 10.3 there are total of 4064 Door Number available to assign in one system. Each Area consists of 254 Doors and exceed the number can be assigned to the next Area.
Example:
Area0 Door number 1~254
Area1 Door number 1~254
Area2 Door number 1~254
…
Area15 Door number 1~254
How Enable Multi Area Mode?
Steps: Run 701ClientSQL --> select Setting --> System Parameter --> Tick option ‘Enable Multi Area Mode (Area.Door)’
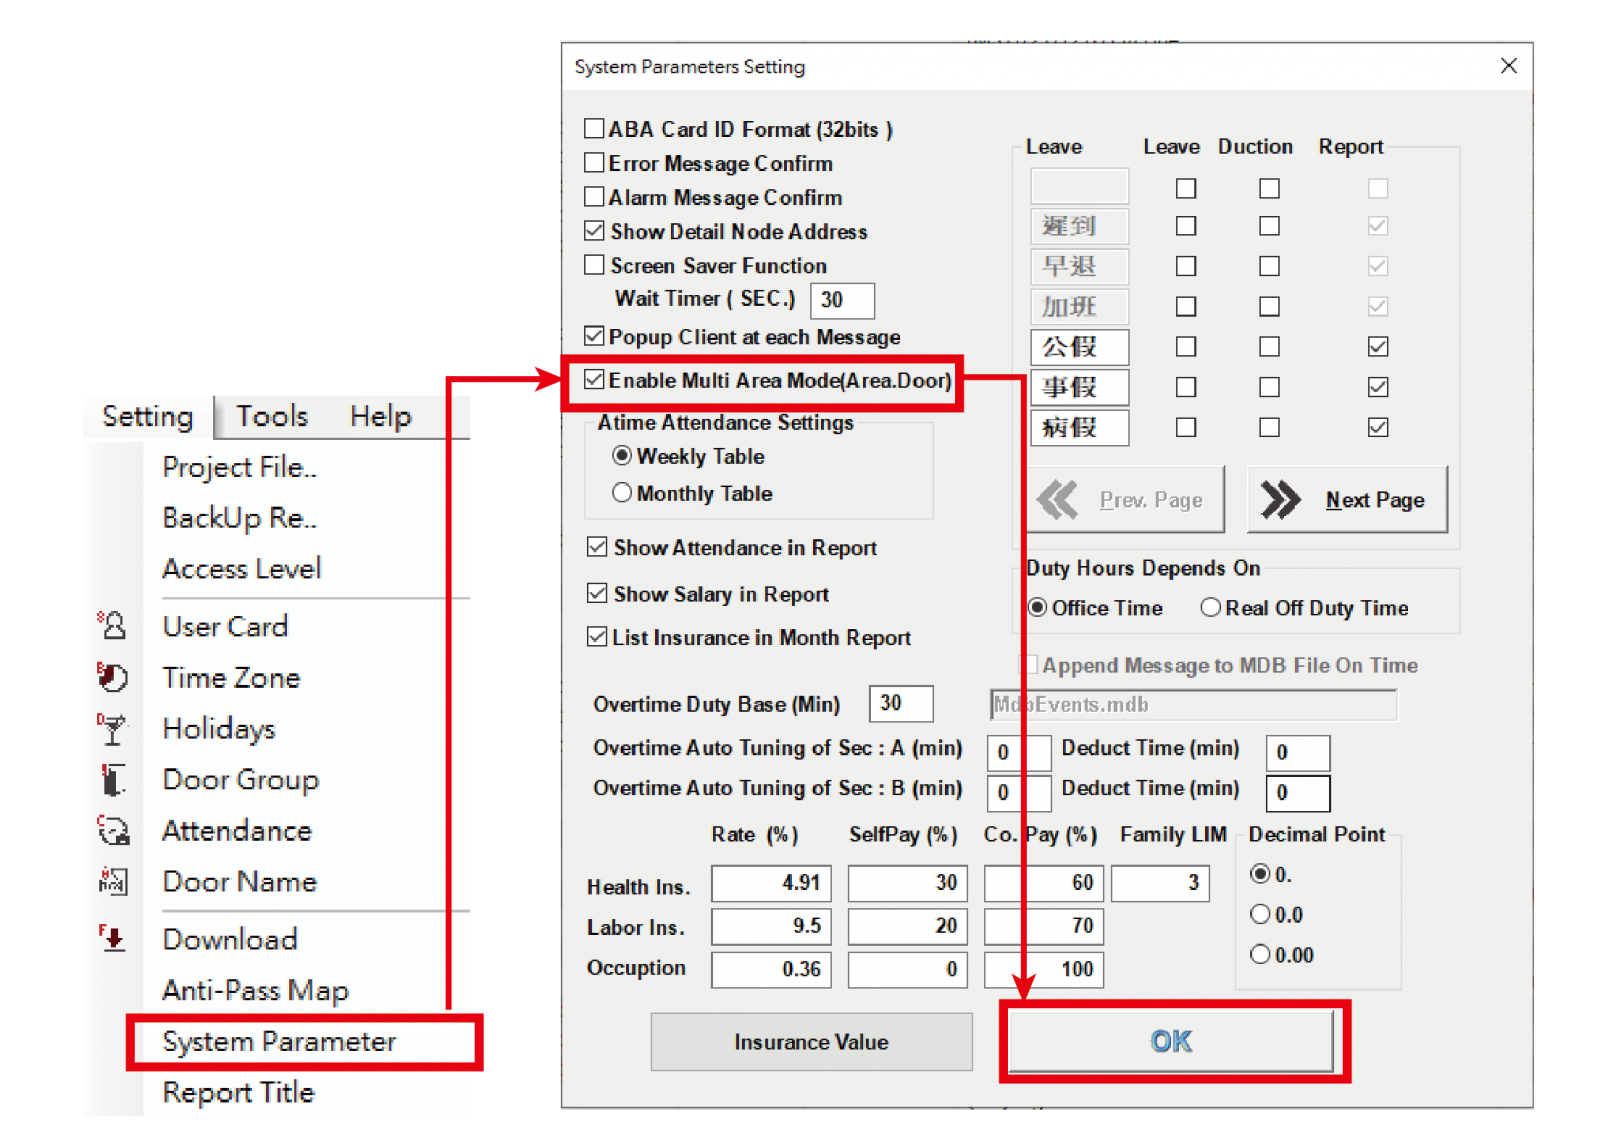
Important:
1. After enabling Multi-Area mode, all of Door Number will be grouped into Area01
2. Next, please change the Door Number grouping into Area00
3. User that has been assigned to specified Door Group setting required to download again all User Card Edit data
STEP 2. Enable ‘Show Detail Node Address’
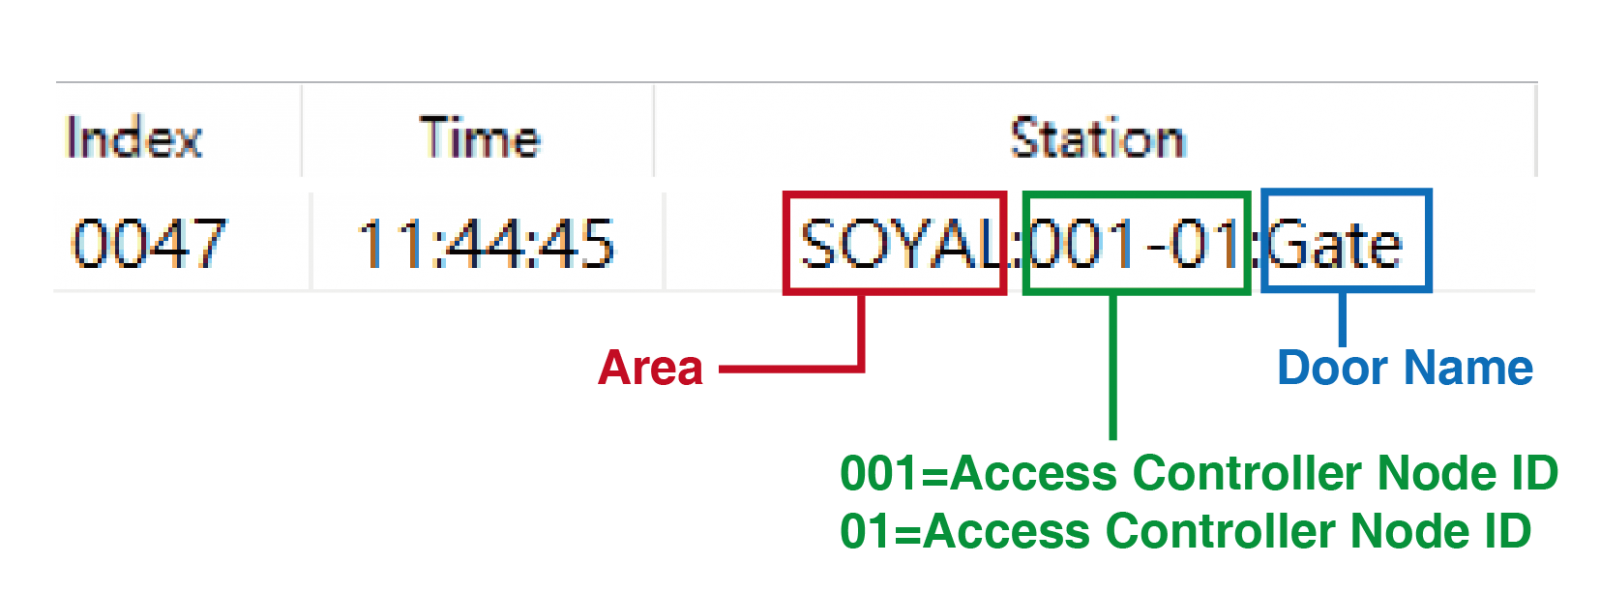
Event log ‘Station’ display format in 701ClientSQL 10.3 Version
When monitoring event log, ‘Station’ will display from where user have access into a particular door. It is required to tick option‘Show Detail Node Address’moreover when your Access Control System is more complex with the combination of Multi-Door Control Panel, Access Controller, and Wiegand Reader.
How to display the more accurate Door Name with details?
Steps : Run 701ClientSQL --> select Setting --> System Parameter --> Tick option Click ‘Show Detail Node Address’and press OK
Then, Restart 701Client to show detail Node Address.
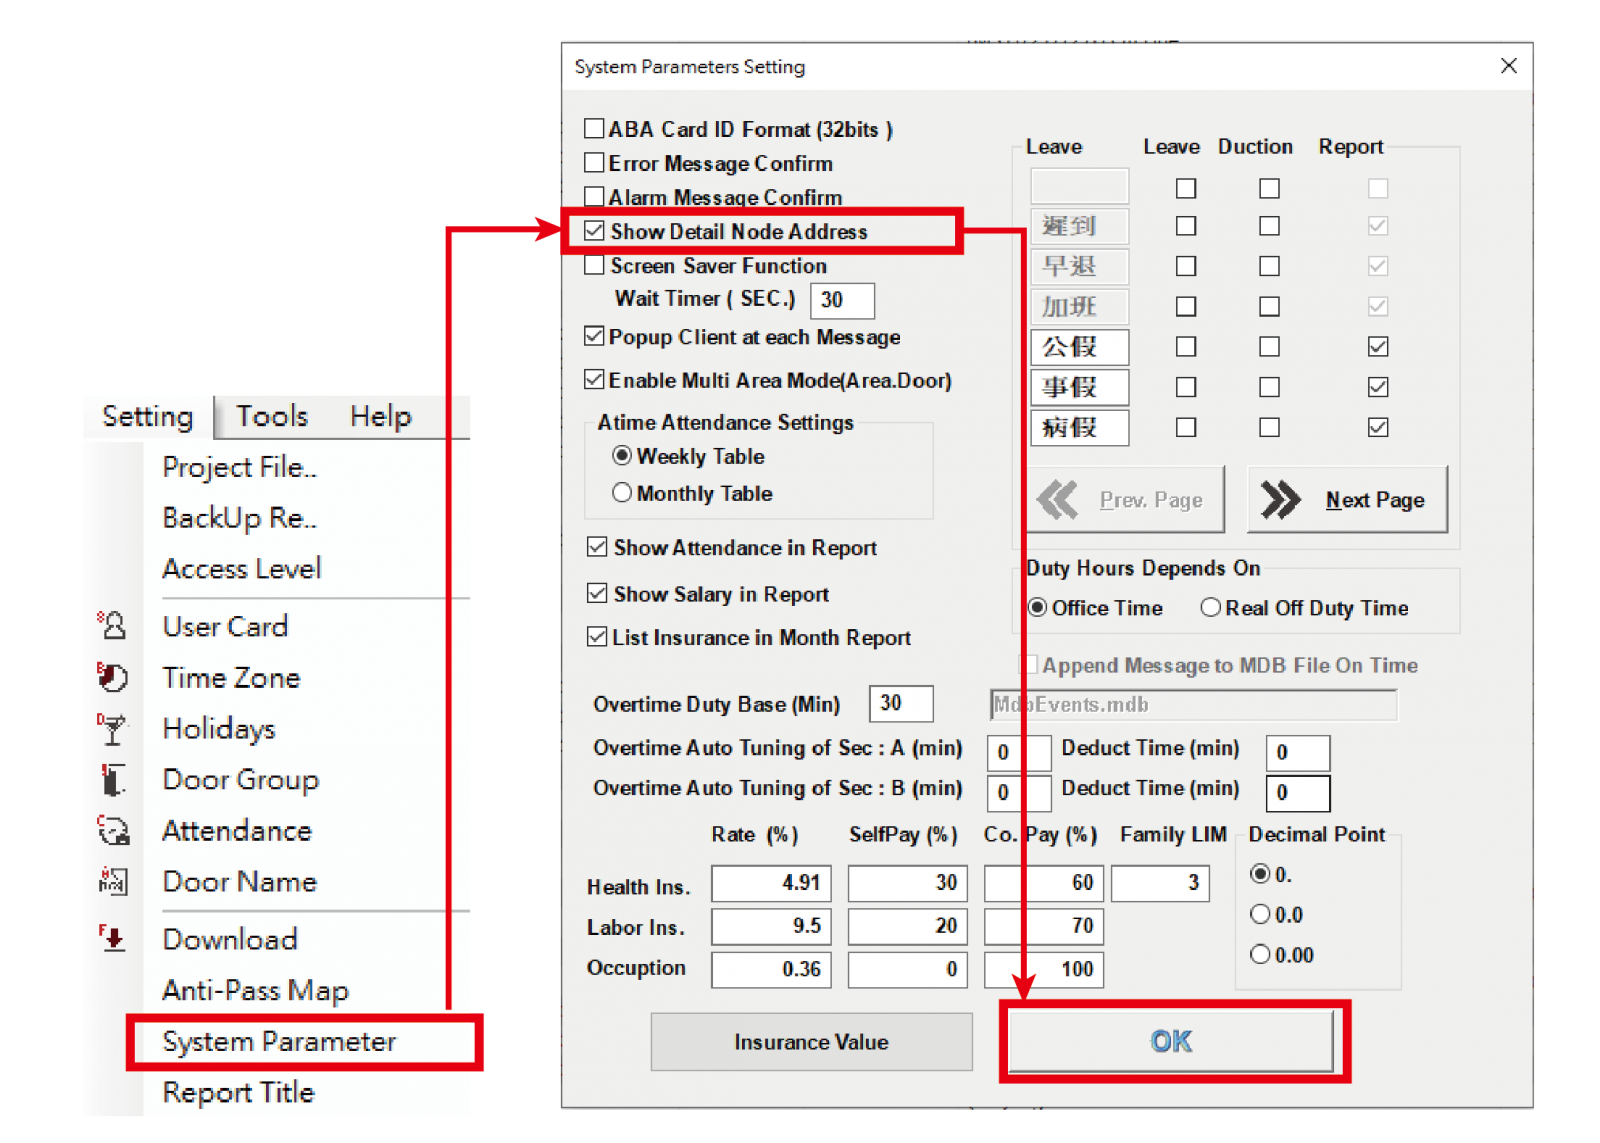
Detail Off : only have the Door Name

Detail On : add the Controller Node ID and the Door Number

Node ID Detail Explanation refer to [Ref 1.]
STEP 3. Edit Door Number Setting
If previously Door Number does not required to do any setting, upgrade to software 10.3 required Door Number to distinguish access point. That way, assigning hardware with designated Door Number in range 1-254 per Area is required.
It is also required to assign Access Controller Setting in different Area if Area0 has fully assigned with door number 1-254.
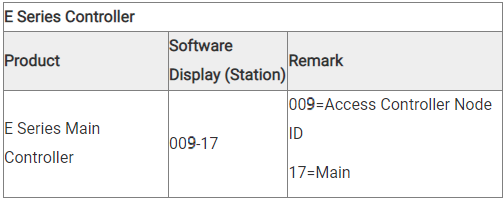
[Ref 1.] Node ID Detail Explanation:
- E Series Controller
.png)

(1).png)
--------------------------------------------------------------------------------------------------------------------------------------
- H Series Controller

.png)
--------------------------------------------------------------------------------------------------------------------------------------
- Under Multi-Door Control Panel
.png)
.png)
| Product | Software Display(Station) | Remark |
| Wiegand wired to H/E Access Controller | WG:001-09 | 001=Control Panel Node ID 09=Access Controller Node ID WG=Wiegand wired to H/E Access Controller |
(1).png)